 One of the things our grandson is interested in is trains, especially steam trains. Via gifts from various friends and relations he accumulated a vast collection of the Brio wooden model trains and tracks; it is favorite plaything at our house. I added needed pieces to the collection by downloading models from the amazing selection of Brio-compatible pieces on Thingiverse and printing them using the Creality CR6-SE that I got via Kickstarter two years ago. These included switches, buffers, gender changers and long straight tracks.
 |
| E's & D's Adventures in Life CC BY 2.0 |
4-8-8-4 or 4-6-6-4?
UP4014 has restrictions on which tracks it can traverse both because it weighs 1.1 million pounds and because the long fixed wheelbase of its two sets of 8 driving wheels cannot negotiate tight curves. The curves of Brio tracks are tight, so that layouts take over only part of the living room. None of the Brio models have a 4-axle fixed wheelbase, so the first question was:Can a Brio model with 4 fixed axles traverse the curves?
 Answering this required making the first test piece, consisting of 8 wheels, 4 axles in 3.1mm steel rod and a block copied from a 3-axle Brio model and extended. This showed that it would negotiate the curves, but that an official Brio model with 4 axles likely would not. The real Brio wheels have bosses that protrude both outboard and inboard of the wheel. The inboard bosses restrict the amount of side play of the wheels on a curve. My wheels were simple disks; the lack of an inboard boss gave them greater side play, allowing the 4-axle test piece to manage the curves.
Thus I decided to go for a 4-8-8-4 model
Note: parts printed in white are test pieces, those printed in black to match UP4014 are "production" parts.
Articulation
UP4014 is an articulated locomotive, the leading driving bogie and truck can swivel to negotiate curves, where the trailing driving wheels are fixed to the locomotive's chassis. Brio has models of articulated locomotives. They have 2-axle bogies pivoted in the middle. Pivoting the 4-axle bogie in the middle wouldn't allow for negotiating the curves. So the driving bogie's pivot had to be at the rear, as close as possible to the front of the 4 fixed driving axles.Leading and Trailing Trucks
 The same consideration applied to the leading and trailing 2-axle trucks. The front truck had to be pivoted at the rear, and the rear truck at the front. Figuring out the design required a second test piece, which added a protrusion at the front of the 4-axle test piece, and made a 2-axle truck with a protrusion at the rear. Both protrusions had holes through which I could connect them using an M2 screw and nut.
The wheels of UP4014's trucks are much smaller than the driving wheels. Brio wheels are all the same size, the size I made the test piece's driving wheels, 20mm in diameter. So the next question was:
How small can I make the wheels for the leading and trailing trucks?
 Actual train tracks have rails sitting in chairs on top of ties (sleepers in English). Thus the center of the track is below the railhead. Unlike this, Brio tracks are grooves cut into a wooden base; the center of the track is above the railhead. Thus there is a minimum distance above the railhead that the underside of the model must maintain. Measured on a genuine Brio model this is 5.5mm, leaving 4.5mm to the centerline of the axle. This is plenty for a 3.1mm axle and clearance.
Using a 1.5mm axle and minimizing the distance from the base of the truck to the bottom of the axle I was able to get the diameter of the truck wheels down to 13.3mm.
 Once I had assembled the test pieces for the whole 4-8-8-4 chassis it became clear just how gigantic this model was going to be. Here is the chassis, without the tender which adds about another 30%, against "Thomas" for scale. The boiler will extend forward to the end of the frame. There will be a cowcatcher and other stuff on the leading truck. The cab will be above the trailing truck. With the tender it will be around 5 times longer than "Thomas".
Overhang On Curves
 The combination of the immense length of the fixed part of the chassis, including the boiler and cab, with the sharp Brio curves leads to the inescapable problem shown in this picture.
The rest of the design needs to ensure than there is enough weight on the fixed part of the wheelbase to avoid the risk of falling over on curves.
Boiler & Cab
 UP4014's power bogie extends well forward of the smokebox door, so the model's boiler need only extend to the front of the frame. Fortunately printing the boiler as a flattened cylinder vertically was well within the capacity of my Creality CR6-SE. The cab was modeled as a solid block that dropped below the frame and covered the trailing truck. Modeling the cab as a solid block helps put enough weight on the fixed part of the wheelbase. I epoxied the cab to the boiler.
Tender
 UP4014's tender has 7 axles and is 35% of the total length. Clearly, the model's tender could not have a fixed wheelbase. So I built a tender test piece with 3 fixed leading axles and a trailing 3 axle bogie, all with wheels the same size as the locomotive's leading and trailing trucks. Posing this tender together with the locomotive shows how immense the model is relative to the normal Brio models!
Magnetic Couplers
The overhang on curves led to the next problem; the Brio magnetic couplers. To remain connected rounding curves, the couplers would have to be on the leading and trailing trucks. According to Dave Pecota, the history of Brio couplers is:By 1964, BRIO customers could choose to buy trains with either hook-eye couplers or “floating” flat-disk magnetic couplers (an important innovation for these little train sets). In 1974, BRIO received a US patent for “fixed” magnetic couplers which are secured by round-head metal tacks ... today’s most commonly used wood train coupler design.The 1974 patent is US3850310A.
The design question was:
How to implement four magnetic couplers:I considered but rejected the idea of making a permanent linkage between the locomotive and the tender, but rejected it because:
- At the front of the leading truck.
- At the rear of the trailing truck.
- At the fron of the tender.
- At the rear of the tender bogie,
- It would be too fragile given the leverage provided by the length of the locomotive and tender
- It would be too restrictive given the "irregularities" inherent to Brio tracks.
- Actual Brio models have tenders with magnetic couplings
 The solution was round-head furniture nails and 10x3mm ring magnets. Because the trucks are lower than the standard Brio models, the couplers had to be mounted near their top, so the round head extends above the top of the truck, but yet the coupler is lower than the standard Brio height. Fortunately they still work just fine, the genius of Brio's coupler design is that it tolerates considerable misalignment.
Cow-catcher
 The next step was to design a piece to sit on top of the leading truck to mimic UP4014's cow-catcher, and the various components that sit ahead of the smokebox door. It wasn't possible to integrate a magnetic coupler with the cow-catcher, nor to replicate the slope and complexity of the front of UP4014. But I did use wire to mimic UP4014's handrails. This involved printing a jig to aid bending the wire correctly.
Putting It All Together
By this time I was pretty happy with the design of each component, so I switched to black filament and printed them all.Assembling the model turned out to be more difficult than I expected. The tricky thing was to connect the wheels to the axles. The CR6-SE's dimensional accuracy printing small holes isn't good enough to make the wheels a press fit on the axles, so they had to be glued together. Because the holes were thus bigger than the axles, the axle and wheel needed to be held at right angles while the glue set, if the wheel was to run true.
I had added bosses to the outside of the wheels so that the axle hole was blind, ensuring that the gauge was correct. These bosses made it hard to ensure that the axle was at right angles. Eventually, I glued the wheels on each side separately with each axle in its hole and a jig holding the bogie so that it pressed against the back of the wheels. This required masking the bogie with Scotch tape to prevent the wheel gluing itself to the bogie.
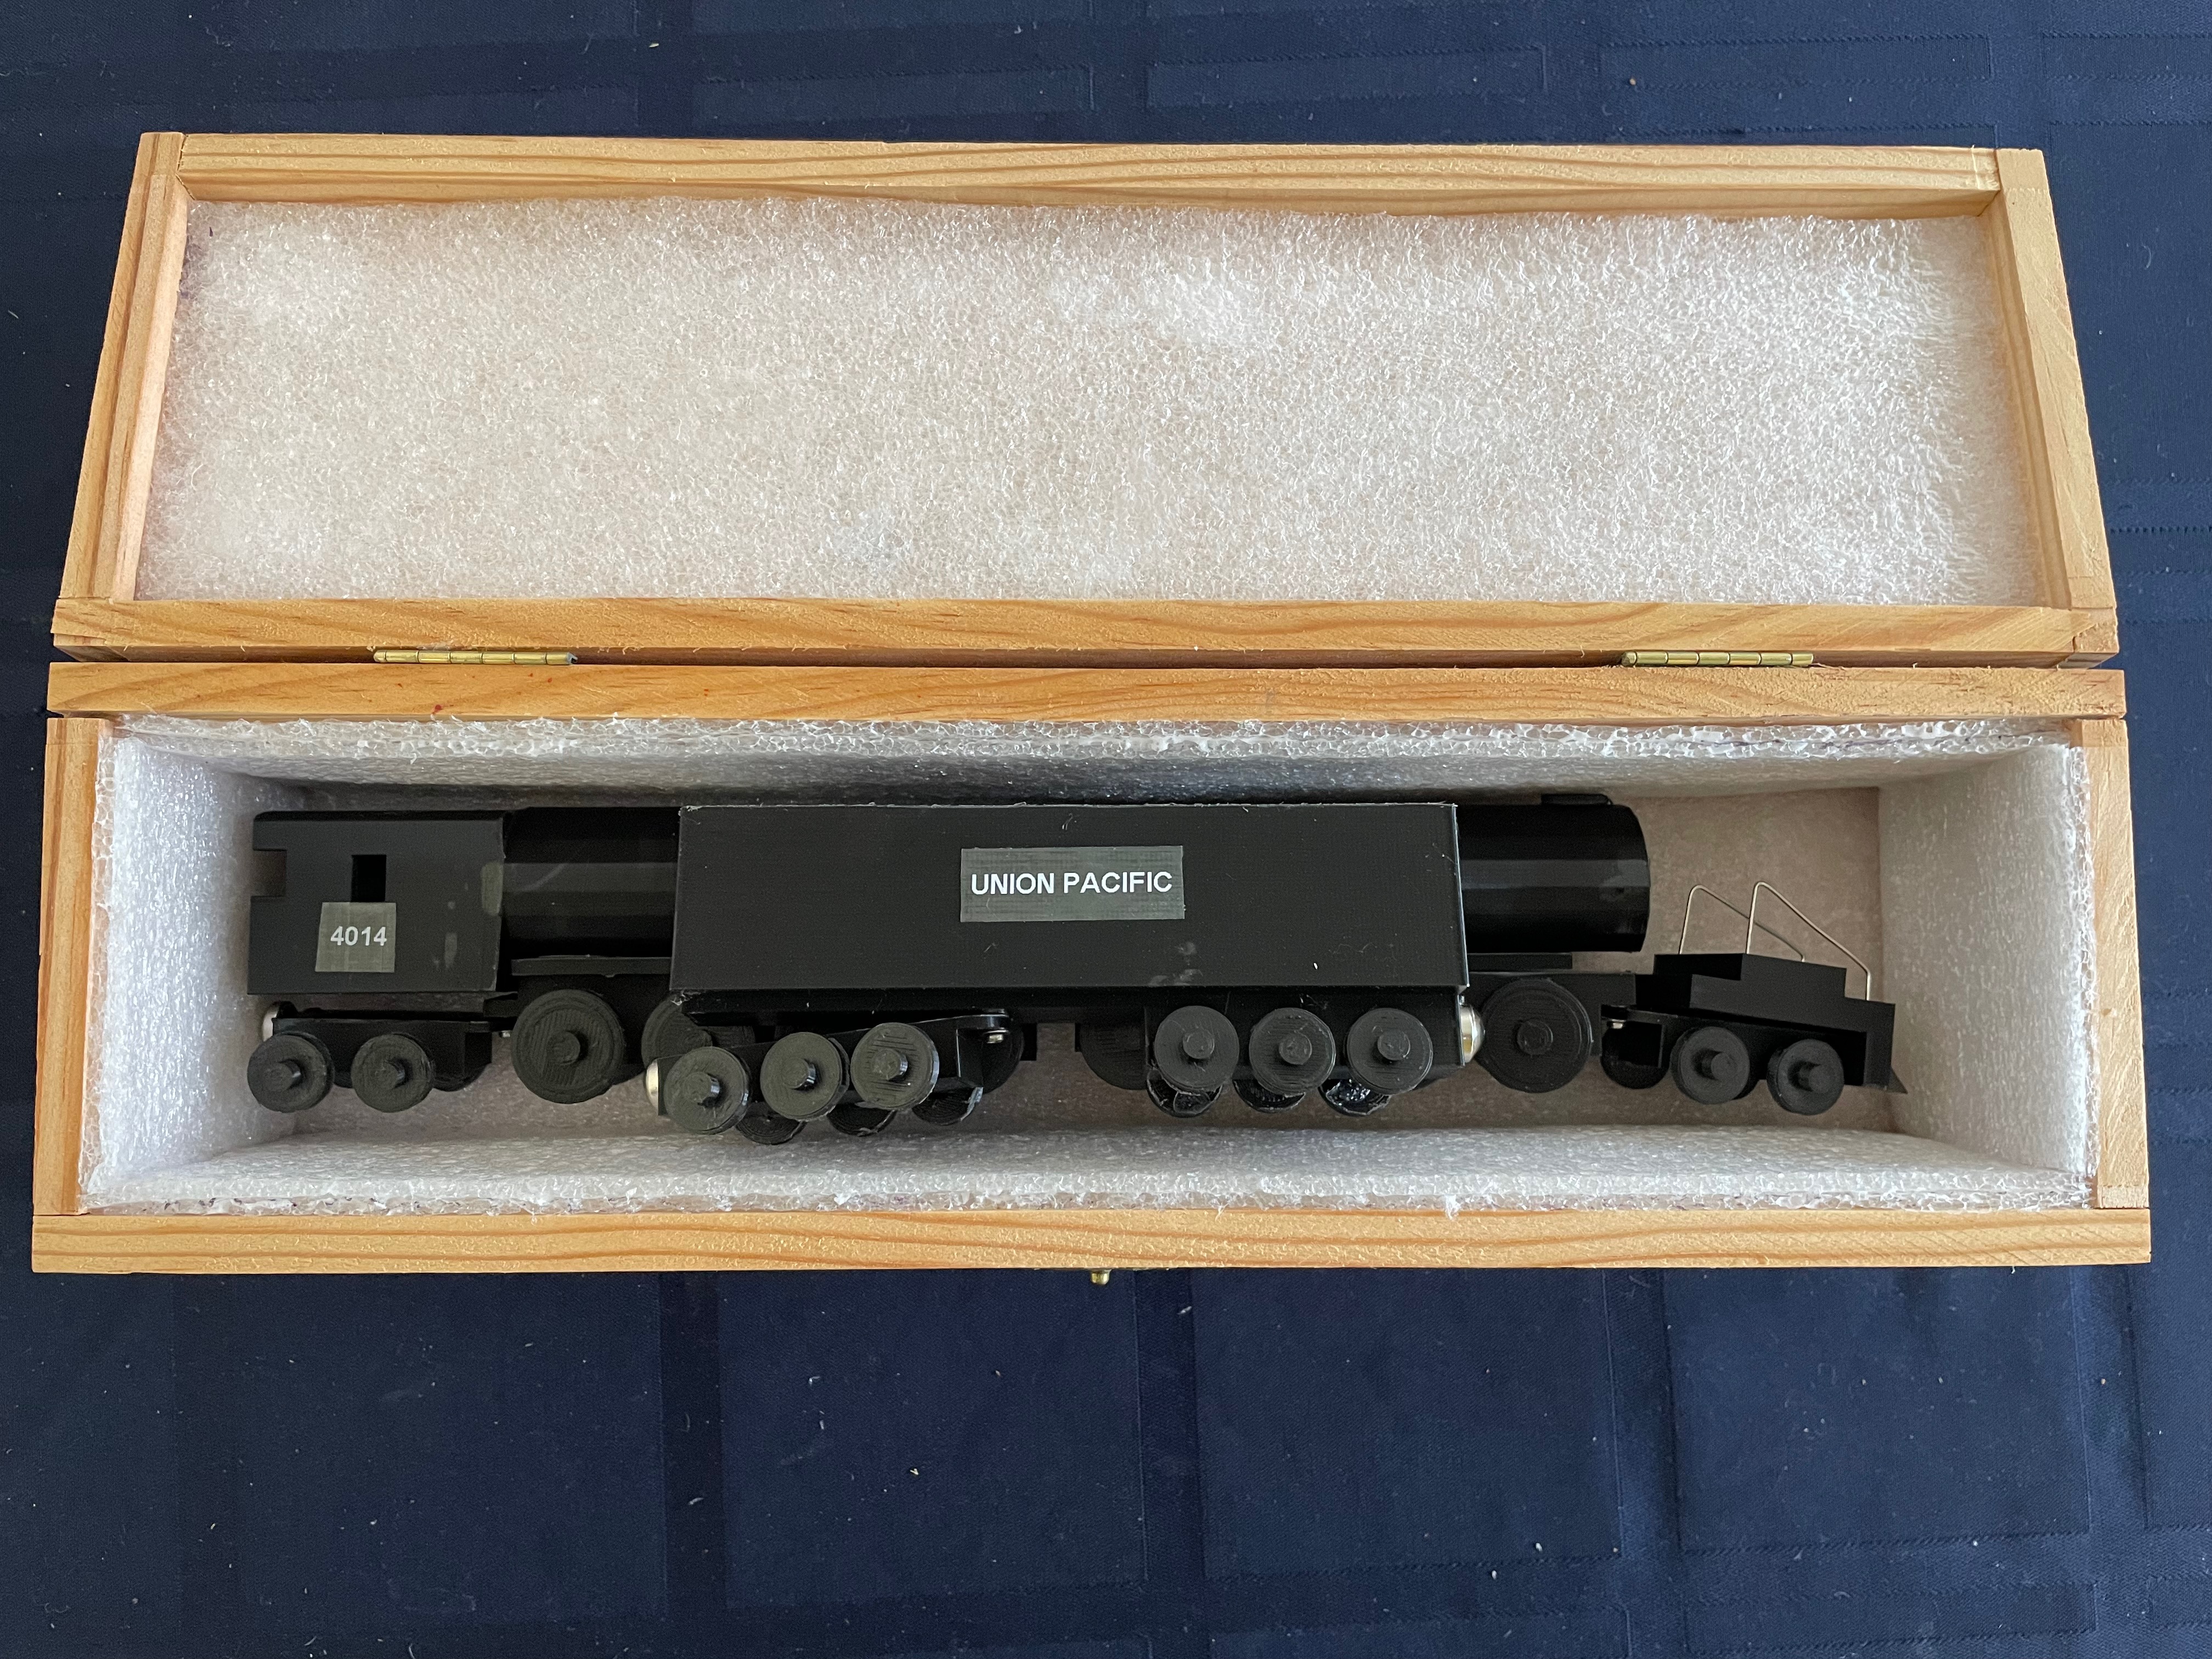
The final details were to put "4014" on the sides of the cab, and "UNION PACIFIC" on the sides of the tender. My sign-painting skills are non-existent, but fortunately DYMO has white-on-clear tape, which made it easy. The only downside is that the tape is glossy, which shows up against the matte black PLA.

The model was assembled and tested with three days to Christmas, enough time to modify a box that once held a bottle of cognac to form a presentation box that we hope will keep it safe in its new owner's hands.
Although it was finished enough to present, it still needs work:
- Some of the axle holes are not quite large enough for the wheels to run as freely as I would like.
- More seriously, the pivots for the bogies are too fragile and will definitely not survive protracted use. In addition, they allow the bogies to swivel too far to each side, increasing the chance of damage. They need to be re-designed and re-printed.
1 comment:
This is lovely! Our daughter just turned 1 and is fascinated by *my* childhood brio trains so we're planning on gifting them to her when she's a little older. Would lover to "borrow" some of that to use in my 3d printer sometime!
Ian
Post a Comment